Get Up and Running with the Maps SDK for Unity
The Maps SDK is a map control for Unity that allows us to utilize Bing Maps 3D Data in Unity-Based, mixed reality experiences. Here is a quick start guide on setting up the Maps SDK control and demoing the packaged samples.
Before you begin working in Unity, you need to install the required software, obtain a Bing Maps Key and create a UnityID.
Preparing Unity and the Maps SDK
Software Installation:
- Windows 10 Fall Creators Update or newer
- Unity 3D (supported versions: https://github.com/microsoft/MapsSDK-Unity/wiki/Unity-Support-Matrix) You can also utilize Unity Hub to target specific Unity editor versions for specific releases.
- Visual Studio 2017+
You can obtain your Bing Maps Key by following the instructions in the Getting a Bing Maps Key page. You can create your UnityID by registering it.
Once you have completed the required installations, obtained a Bing Maps Key and created your UnityID, you will need to download the Unity Asset Package for the Maps SDK.
You are now ready to set up the Unity Project.
- Open Unity3D and use your UnityID to log in.
- Select the "New" Icon to create a new Unity Project.
- Once your Unity Project loads, select from the menu bar Assets > Import Package > Custom Package and select the Unity Asset Package for the Maps SDK we downloaded earlier.
- You will be prompted to import the package. Click Import.
- The Maps SDK Unity Package should now be fully loaded into your project.
In the Unity Editor, find the Project Explorer. Here you will see all the files inside of your project. By expanding the Assets folder, you will see all the contents of the package necessary to get running with the Maps SDK within Unity.
Creating the Unity Scene and Map
To begin, you will have to create a Unity Scene. Go to File > New Scene. This should create an untitled scene. Inside the Hierarchy, you should see only two game objects: Main Camera and Directional Light.
To create the map, you must create an empty 'GameObject'. Right Click anywhere inside the hierarchy and select 'Create Empty' or click Game Object > Create Empty from the top menu bar.
You should know see a new 'GameObject' in your hierarchy. Feel free to rename this gameobject by right clicking it in the hierarchy and selecting rename.
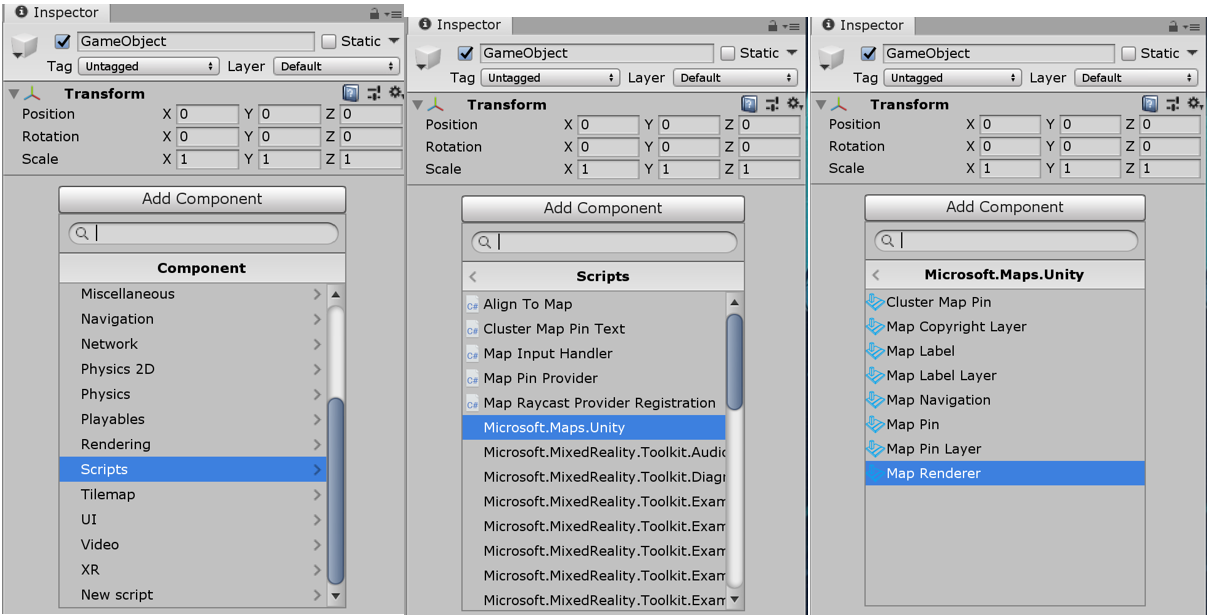
The next step is to add a MapRenderer component to our empty 'GameObject'. Do so by selecting the GameObject. This will bring up the GameObject's components in the Unity Inspector window. In the inspector, click Add Component > Scripts > Microsoft.Maps.Unity > Map Renderer.

The Unity Inspector window should now display the Map Renderer. The Map Renderer will have several fields and options. You can read more about configuring the MapRenderer here. For now, under API Settings, input your Bing Maps Key to enable the map.
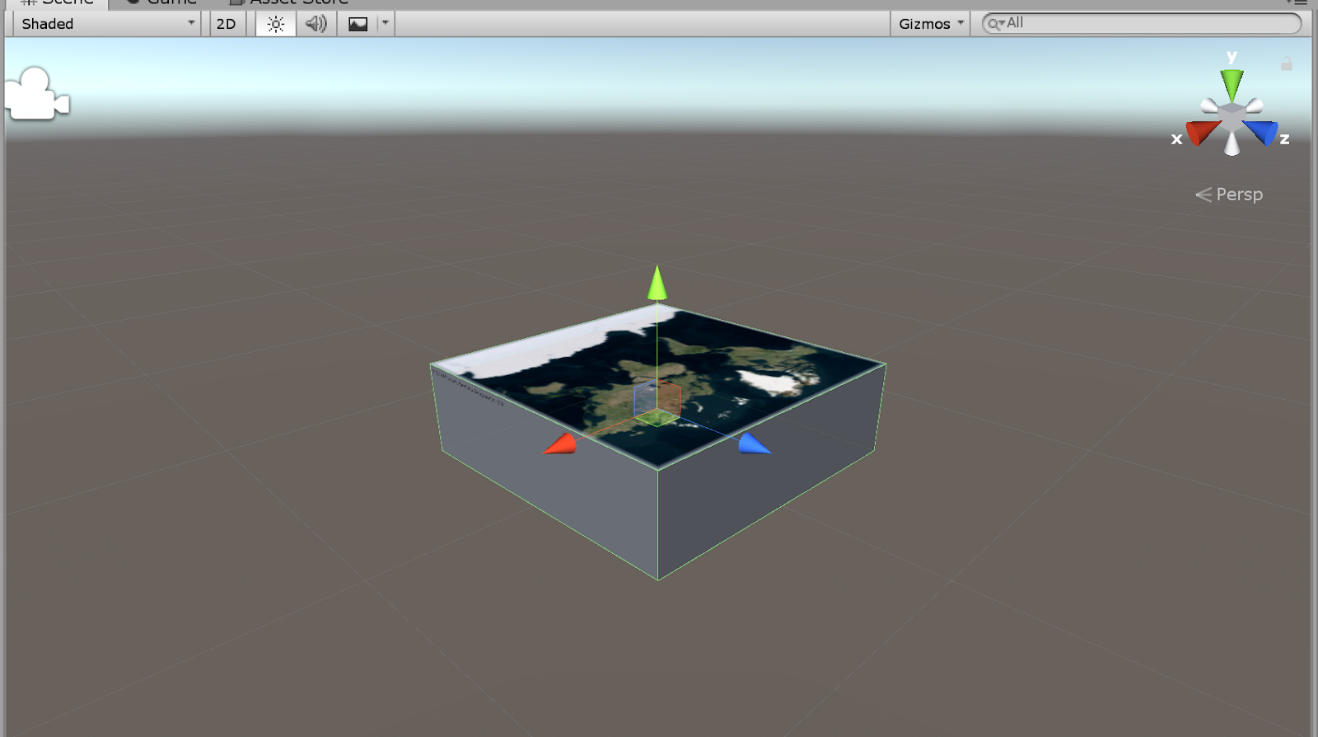
Once the key is validated, you should now see Bing Maps overlaid on your GameObject.

Now you are ready to begin adding other GameObjects, labels and animations to the map! Make sure to visit the Maps SDK Wiki for the full SDK reference and additional tutorials.
Demoing the Sample Projects
In the Project Explorer, expand the Assets folder. Inside, open the Microsoft.Maps.Unity.Examples folder. You should know see three sample folders:
- City Tour Example
- Map Pin Example
- Weather Cube Example
Simply open the scene inside the sample folder to load the desired sample. Keep in mind that you will need to provide your Bing Maps key in the Map Renderer Component in the 'Map' GameObject.
For more detailed information about the Maps SDK sample projects visit here.
– Bing Maps Team
Source: Bing Blog Feed