Azure NetApp Files
One of the most common criticisms of Azure has been around storage and data performance, however a new service has recently been released that, on the face of it, might address this problem from a file share perspective. Just over a month ago Microsoft released to General Availability a service which claims to deliver enterprise grade file shares, this service is Azure NetApp Files (ANF).
Firstly, don’t let the name fool you, this is a Microsoft first party service, or as Microsoft calls it, ‘in-blade’, it is not a Marketplace offering. No need to purchase any additional licenses or create accounts, its simply consumed on-demand and billed as part of your Azure subscription. This is a managed service integrated into the Azure portal, via REST API, CLI or PowerShell. Azure customers can create both CIFS and SMB file shares in minutes and connect to virtual machines.
Now I don’t know about you but the only way I learn new technology is to get hands on time building it and breaking it, so let’s dive into the Azure portal and create an ANF service, capacity pools and volumes.
The following sections will cover:
- Registering for Azure NetApp Files
- Configuring the resource provider in the subscription
- Setting up Azure NetApp Files Account
- Creating Capacity Pools and Volumes
- Mounting a volume on a server
- Performance Testing of mounted Volumes
Registering for Azure NetApp Files
You will need an Azure subscription that has been white-listed for Azure NetApp Files before you can use this service. To register for ANF and have your subscription white-listed please use this link https://docs.microsoft.com/en-gb/azure/azure-netapp-files/azure-netapp-files-register#waitlist
Once white-listed you need to register the resource provider. Login to your Azure subscription. For those who have access to multiple subscriptions make sure you are working in the subscription that has been white-listed for ANF. To select the correct subscription run the following command in the Azure Cloud Shell console:
az account set --subscription <subscriptionID>To check to see if the subscription has been white-listed for ANF run the following command:
az feature list | grep NetAppIf your subscription is white-listed you should see an output similar to that below:
"id": "/subscriptions//providers/Microsoft.Features/providers/Microsoft.NetApp/features/ANFGA",
 "name": "Microsoft.NetApp/ANFGA"
Run the following command to register the Resource Provider:
az provider register --namespace Microsoft.NetApp --waitTo check that the Resource Provider has been registered run the following command :
az provider show --namespace Microsoft.NetAppThe output from the above command should show that the Resource Provider has been registered:
{
 "id": "/subscriptions/<SubID>/providers/Microsoft.NetApp",
 "namespace": "Microsoft.NetApp",
 "registrationState": "Registered",
 "resourceTypes": [….
Setting up Azure NetApp Files
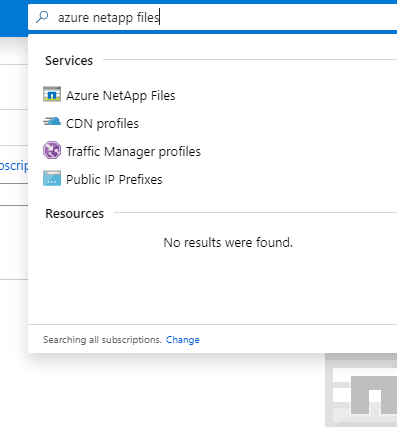
- Login to the Azure portal and browse to the ANF blade, the easiest way to find it is to use search in the toolbar, as per the image below.
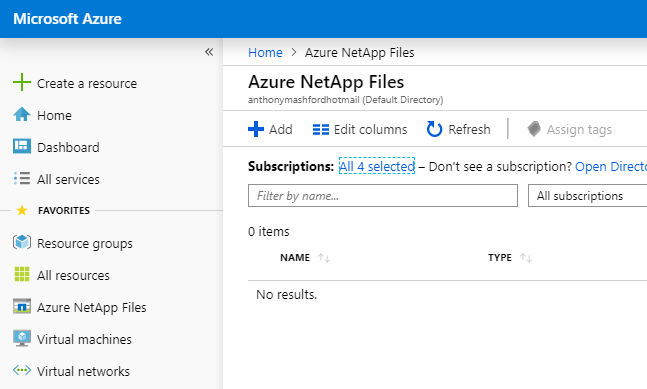
- Within the ANF blade select Add to create a new NetApp account.
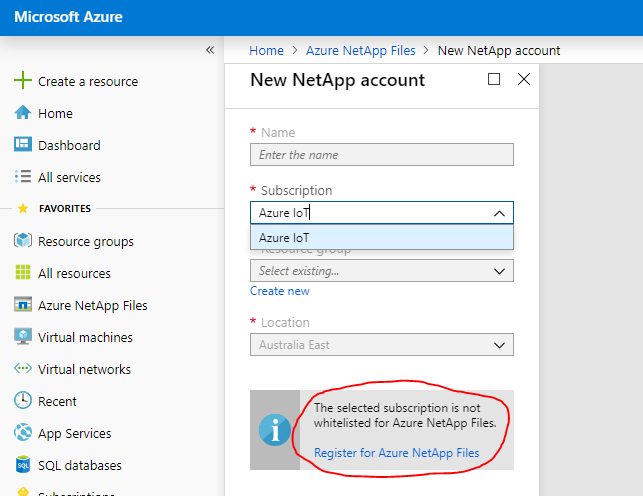
- If you see the informational message stating that the subscription has not been white-listed for ANF you will not be able to create the service. See image below:
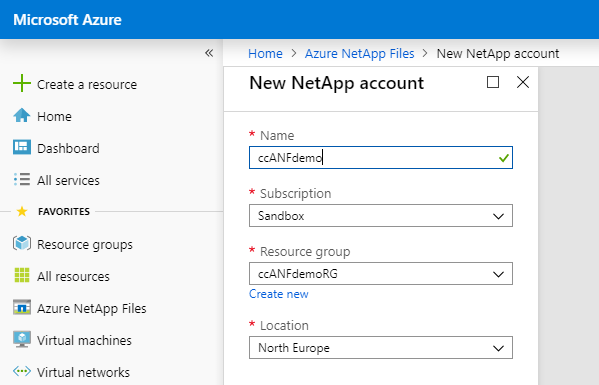
- Once the subscription has been white-listed you can create an account. Click Add, you need to Name the account, select the Subscription, Resource Group and Location and click Create. It should only take a minute or two to create the account.
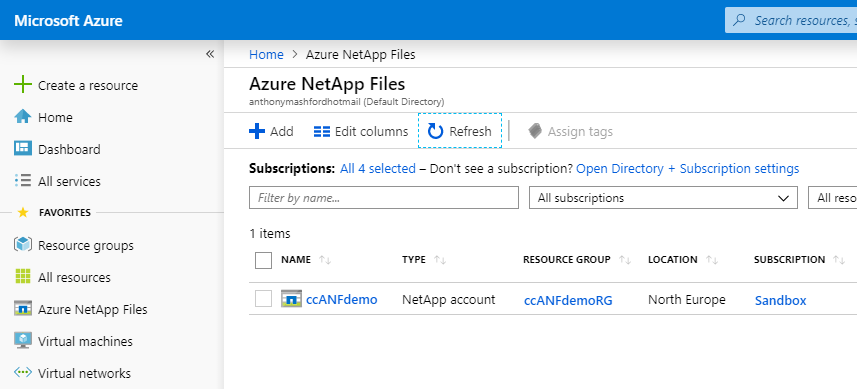
- Once the Azure NetApp Files account has been created it will appear in the blade, as per the image below.
Click on your newly created ANF account to access the configuration blade. Here you will see an Overview of the account, as well as Settings, Azure NetApp Files configuration and Storage Services.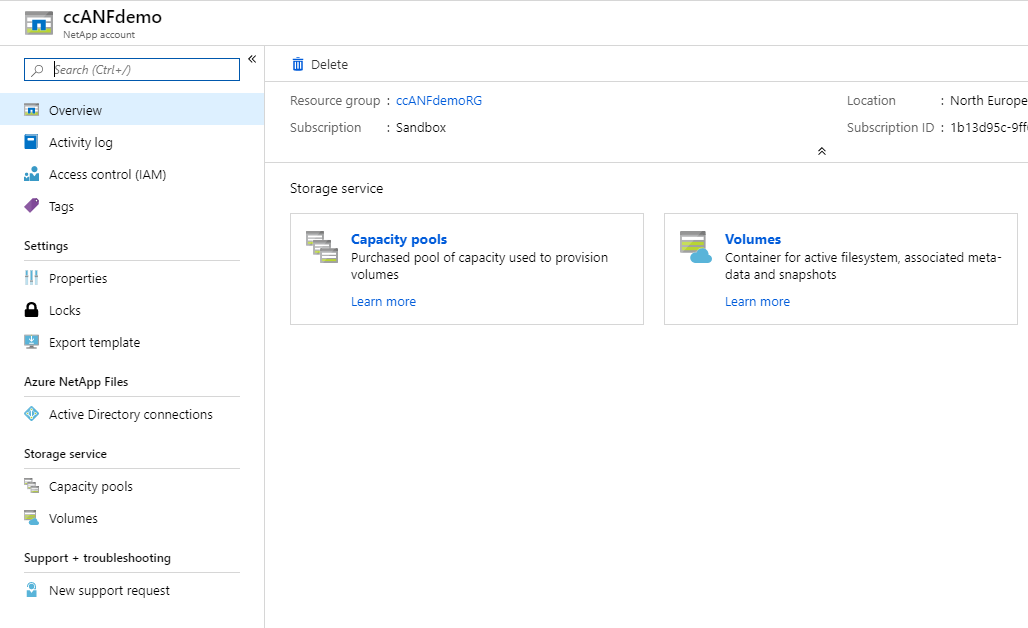
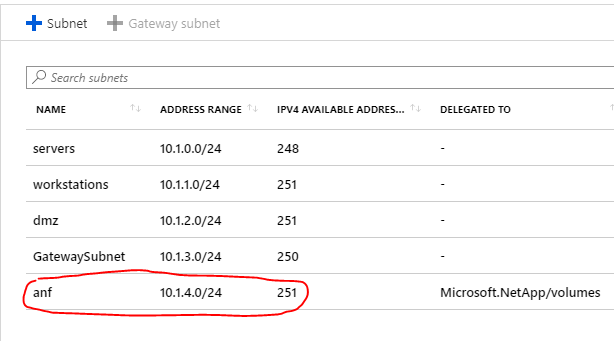
- It is important to note that ANF requires a dedicated subnet within a VNet, this is known as a delegated subnet. Make sure that you have one in place prior to setting up ANF Volumes. The image below might help as it shows the subnets within my demo lab VNet.
- Within the ANF blade, select Active Directory Connections and then select Join. Enter the details for DNS, Domain, SMB prefix, OU as well as username and password to join the ANF service to your active directory.

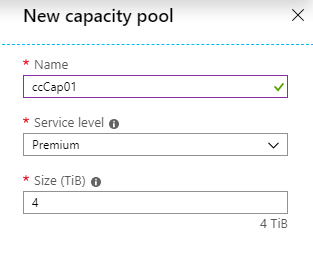
- Next select Capacity Pools and click Add. Enter the Name of your capacity pool, select your Service Level (Standard, Premium or Ultra performance levels) and size of pool (Minimum size is 4 Tb) and then increments of 1 TB thereafter. Click OK.
Next select Volumes and Add Volume. On the Create Volume Basics tab input the Volume name, select Capacity Pool that you created before, input a quota, I chose 100GB and select your VNet and Subnet to host ANF. Click Next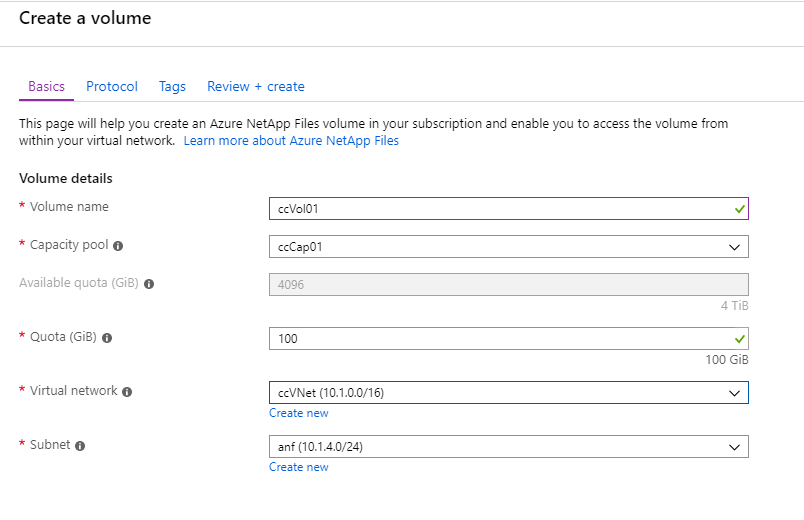
- On the protocol page choose your Protocol Type, Active Directory and Share Name. Click Next

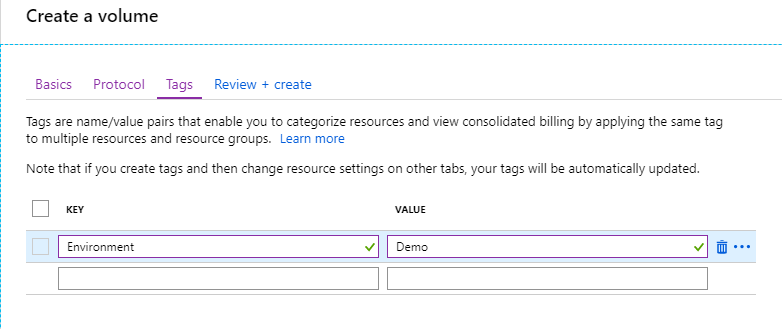
- On the next tab add Tags (if required). Click Next.
- The review should look something like that below, click Create. This will take a few minutes to complete.
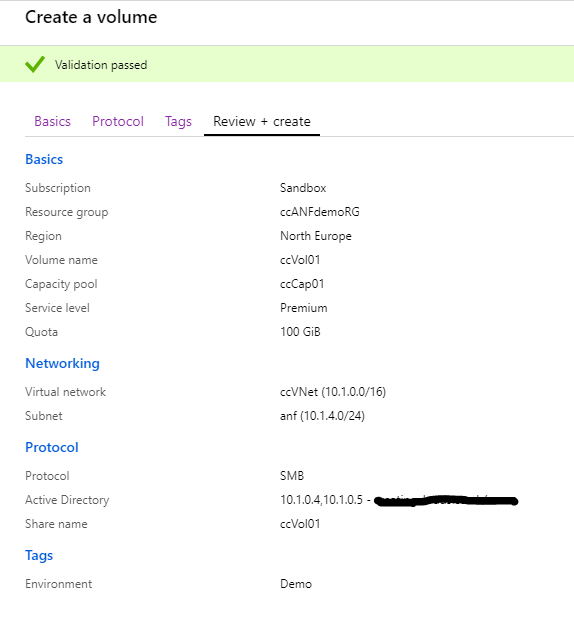
- Once completed you now have ANF setup, joined to Active Directory, Capacity Pool and Volume created using the SMB protocol.
Performance testing
Now that we’ve created our ANF service let’s get it connected to a server and carryout some performance testing to see how the data storage responds 🙂
Azure NetApp Files supports three service levels – Ultra, Premium, and Standard. Performance statistics below:
- Ultra storage – The Ultra storage tier provides up to 128 MiB/s of throughput per 1 TB of volume quota assigned.
- Premium storage – The Premium storage tier provides up to 64 MiB/s of throughput per 1 TB of volume quota assigned.
- Standard storage – The Standard storage tier provides up to 16 MiB/s of throughput per 1 TB of volume quota assigned.
In order for us to map our network drive we need to know the path require to make the connection. This is where Microsoft/NetApp have made life easy by including the Mounting instructions within the Volumes blade.
The mounting instructions are included within the ANF blade, select Volumes then select the Volume that you created in the previous steps. Once the Volume blade opens select Mounting Instructions, this will display the details required to mount the volume on both Windows & Linux servers. The image below shows how this will look for mounting a drive on a Windows platform: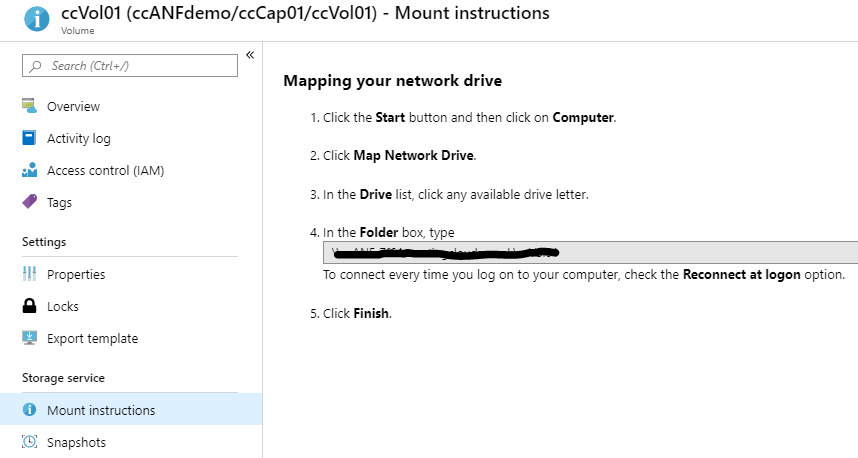
Simply copy the UNC path and use it to Map your drive in Windows Explorer, as per the image below.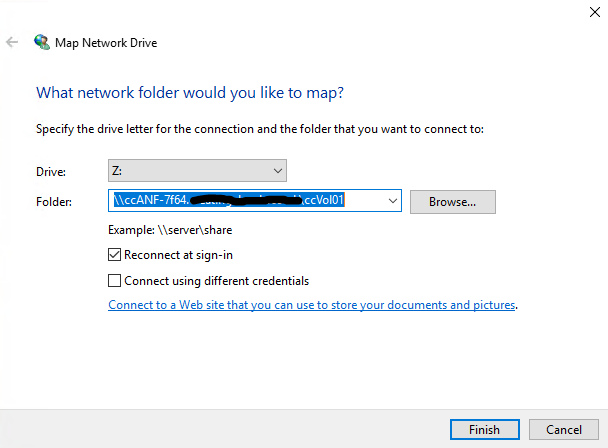
Now that we have the Volume mounted on the server let’s do some performance tests. The Volume we created was 100GB on Premium storage which if you refer to the metrics above should give us 64 MB/s of throughput per 1 TB. However we only have 100GB, roughly assuming that is equal to 10% of 1TB we should see a throughput of ~6.4MB/s. To capture the performance of the Mounted volume I used Chrystal Disk Mark. Now I know someone die hard storage guru’s will scoff at this tool but its all I have to use, get over it!
First test, 100GB Volume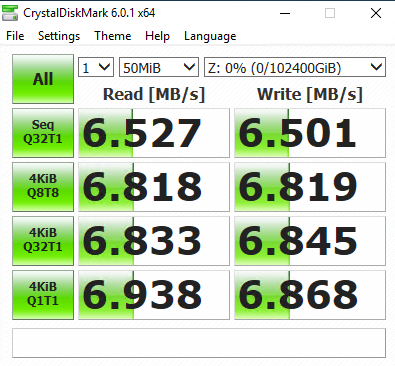
Results:
| Item | Size |
| Volume Size | 100GB |
| Storage Tier | Premium |
| Throughput | ~6.5MB/s Read/Write |
Now let us resize the Volume to 1TB and run the test again to see what throughput we get, yes, you can resize Volumes, it’s really easy 🙂
To resize a volume go to the Volume and click on the three dots to the right, that’s the only way I can explain them, I’m sure they’re called something else, then select Edit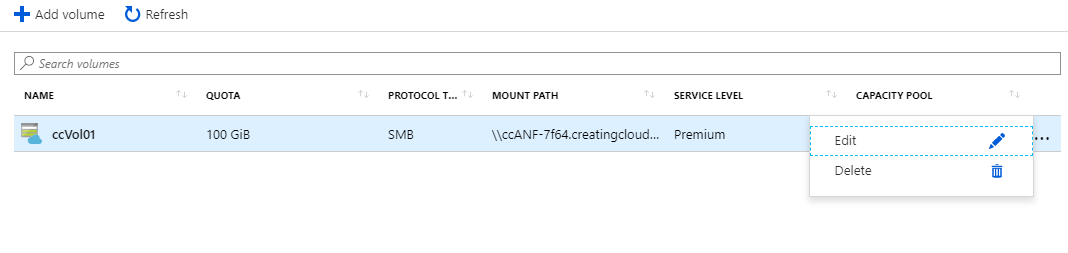
Next, in Quota Size change it to 1TB or whatever you want to set it to and click OK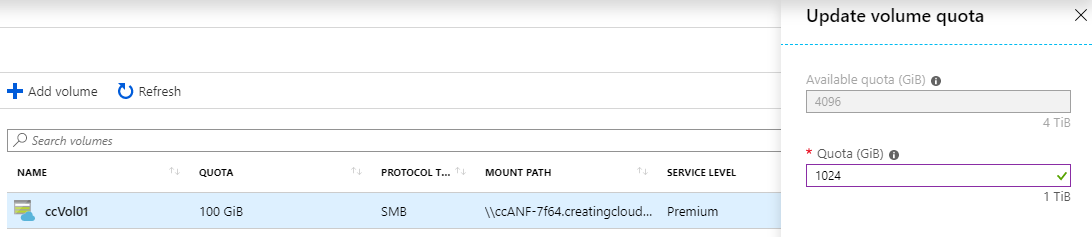
Now that we have resized our 100GB volume to 1TB, let’s run the test again.
Second Test, 1TB Volume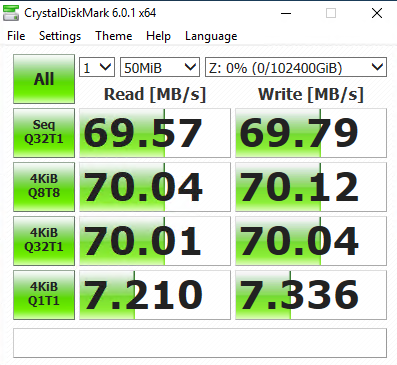
Results:
| Item | Size |
| Volume Size | 1TB |
| Storage Tier | Premium |
| Throughput | ~69MB/s |
Summary
Hopefully this article has been useful and given you an idea of Azure NetApp Files (ANF) and its capabilities at a basic level. The service also has other features that I have not touched upon, but will get to in the future. It is early days for ANF as it is in its infancy, I’d imagine that more features and improvements will be added as time goes on. Personally I feel that a service like ANF has been long over due in Azure. The ability for customers to consume High Performance Storage, as-a-Service on-demand without the need to stand-up expensive servers with equally expensive disks is simply awesome. Please, I urge you, do not take my word for it, go out and configure it for yourselves and play with/break it and see what it can do for you.
Excellent article Anthony and thanks for coming in to see us.
Brilliant work Ant, the only thing that Microsoft are lacking are integrated tools for this service, otherwise a brilliant offering in terms of ease of setup and usage and flexibility.
It would be nice to see scheduled snapshots and backups and replication for this service soon.