Build your ads free search engine with Bing Custom Search API
It’s a little over 6 weeks since we made the Bing Custom Search API generally available. We are excited to see the applications our partners are building and are overwhelmed with the response we are receiving. If you haven’t tried Bing Custom Search API yet, this blog post will help you to get started.
Bing Custom Search API – Salient Points
- Ads free search experience for your website.
- Complete control over which domains, subsites, or webpages to surface results from. This will enable you to build a tailored search experience for different topics for any industry type (e.g., health, entertainment, retail, finance etc.) that your application demands.
- Free hosted UI for search experience.
- Free access keys to explore, tweak, and configure your search instance followed by a pay-as-you-go subscription.
- Ability to promote, demote, and pin search results.
- Trusted indexing and relevance capabilities of Bing.
To learn more about Bing Custom Search API, check out the overview within our documentation. For getting started in C#, Java, Node.js, or Python languages, see our Quickstarts. For more detailed onboarding and hosted UI information, visit our tutorial section.
Also, please watch our short online demo about Bing Custom Search API here.
Getting Started
Below is the step-by-step process of how to sign up and create your new custom search instance:
- Get Access keys
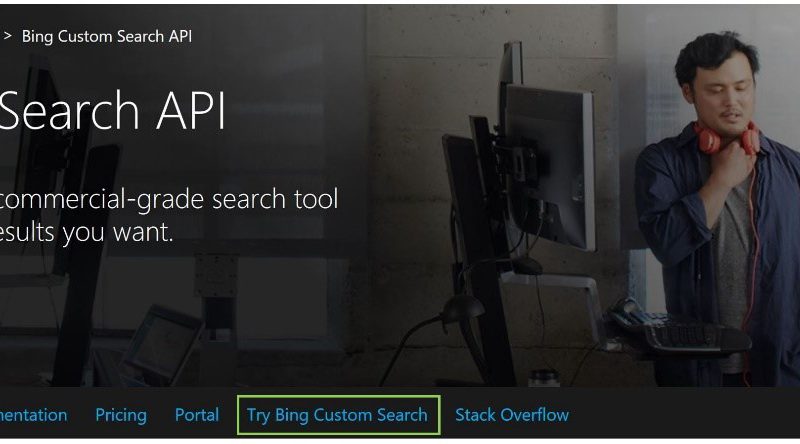
You can start your journey of building your customized search engine from here: https://azure.microsoft.com/en-us/services/cognitive-services/bing-custom-search/. For getting free access keys click on “Try Bing Custom Search”. Free access keys are good for exploring and tweaking the search instance you will create next. Alternately, you can buy paid subscription from the Azure portal.

- Create Custom Search Instance
Go to https://www.customsearch.ai/ and sign in using your outlook.com, live account etc. This is a home to your search instances (each search instance is your custom search engine) and you will come back here to modify the existing instances or create new instances in the future.

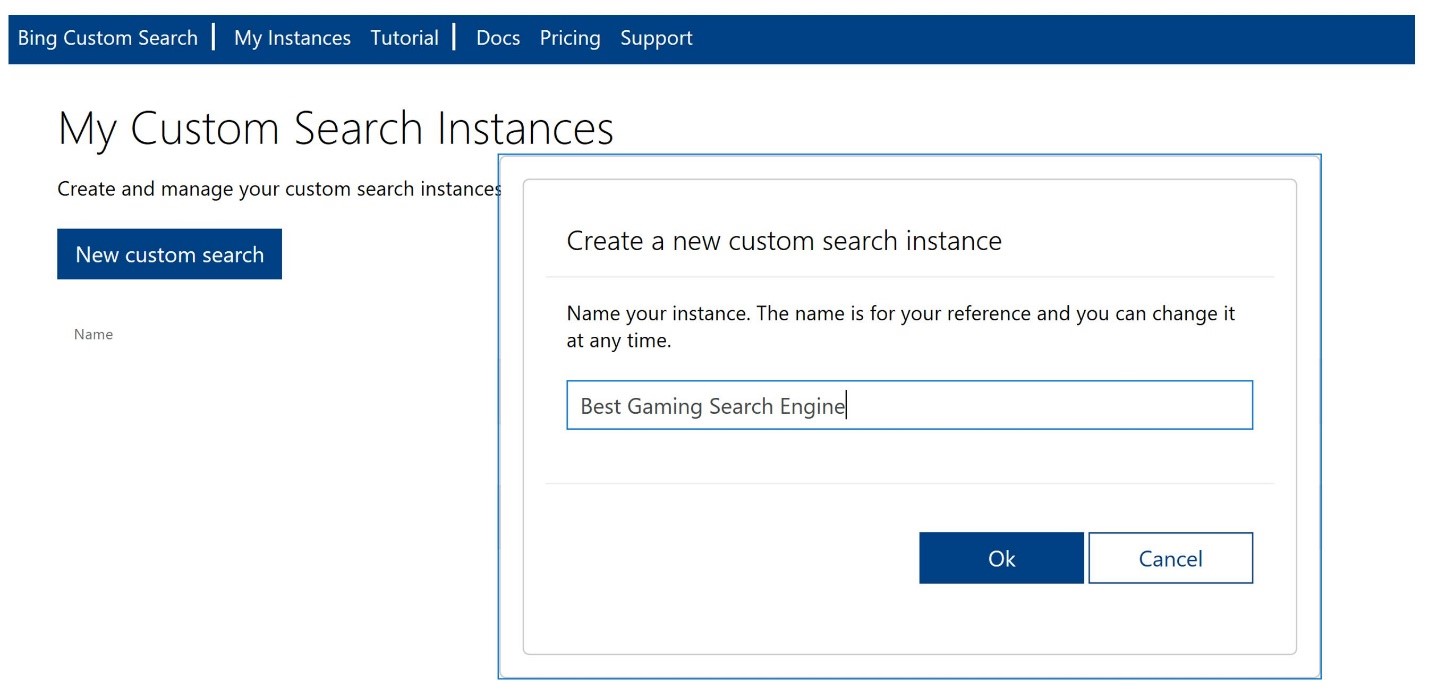
Create a new search instance – you can alter the name of this instance any time in the future.
After creating this instance, you can add sites, subsites, or exact URLs in the definition editor. Below is one such example. You can batch upload multiple websites by clicking on the cloud button highlighted in the below image. You can also add some more sources from “You might also want to add” section at the bottom of the page.
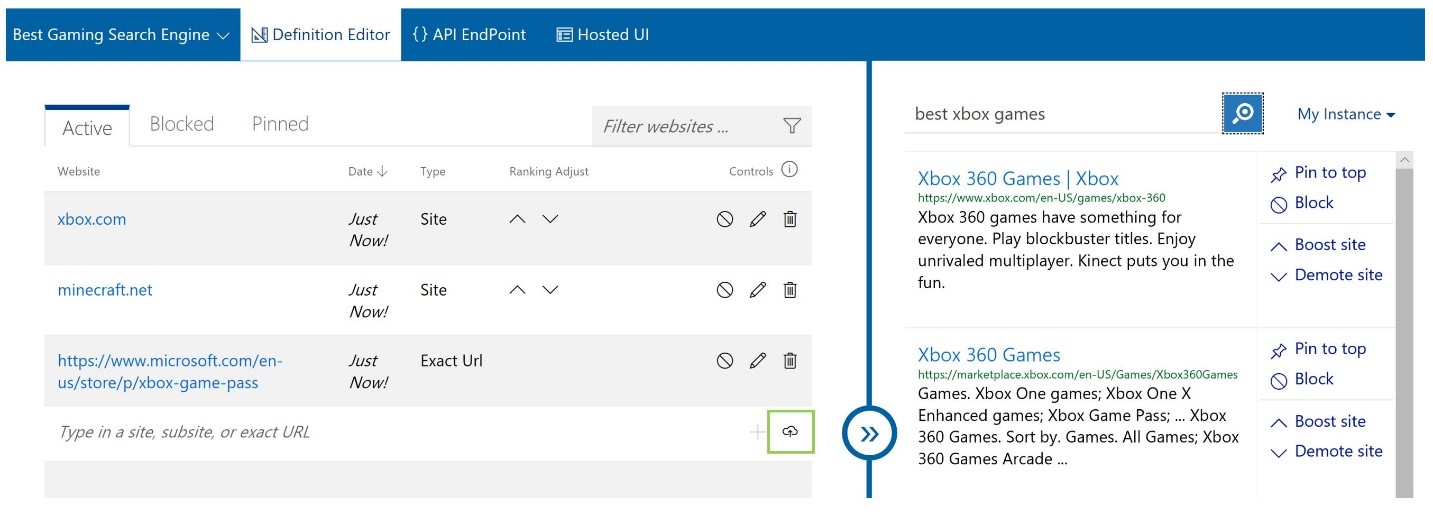
While adding websites, you can check results on the right side of the frame by typing in your queries. Also, compare these results to Bing results by switching to “Bing” from “My Instance.”
- Using Custom Search Instance
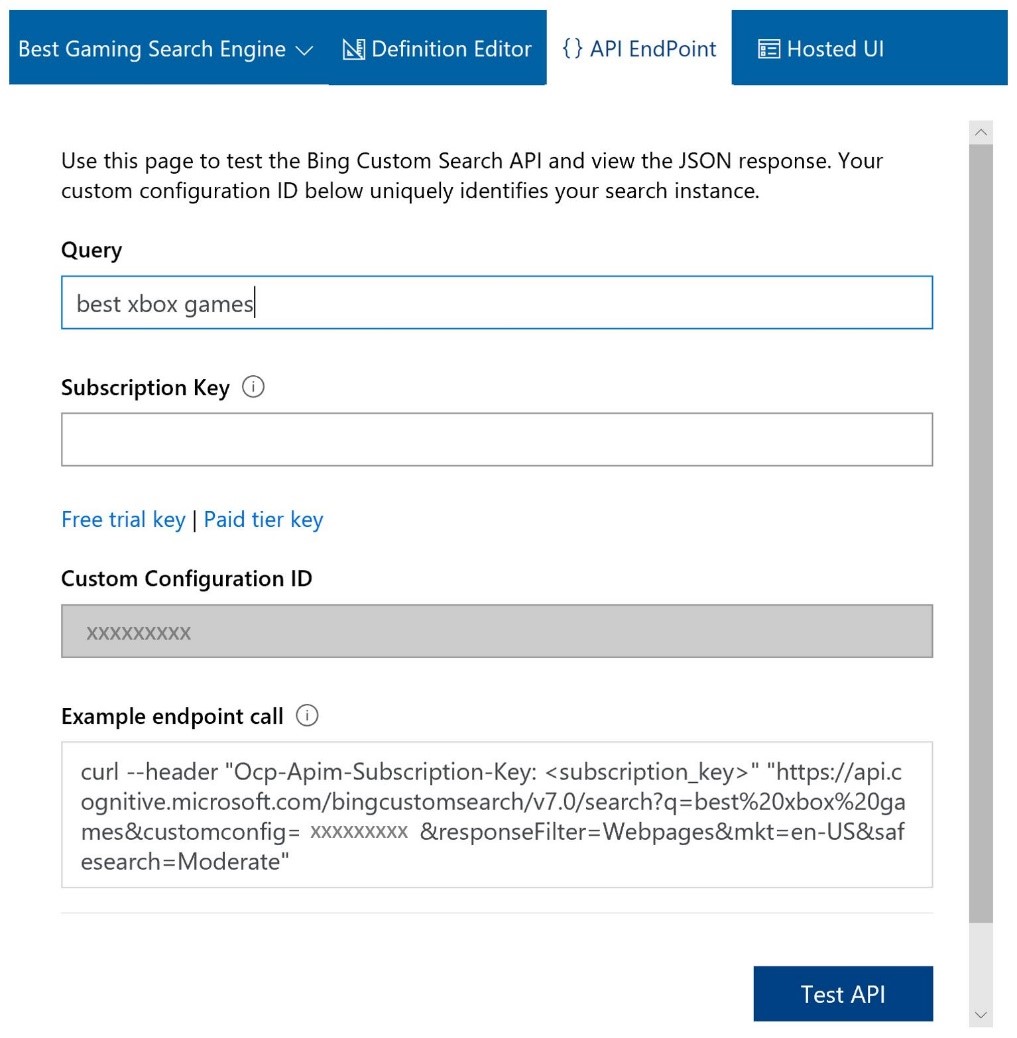
Once your custom search instance is created, you can get your “Custom Configuration ID” and example endpoint from the “API Endpoint” tab. Insert your free or paid subscription key to see your custom search engine in action. Embed the “Example endpoint call” in your application to get JSON response for the user query.
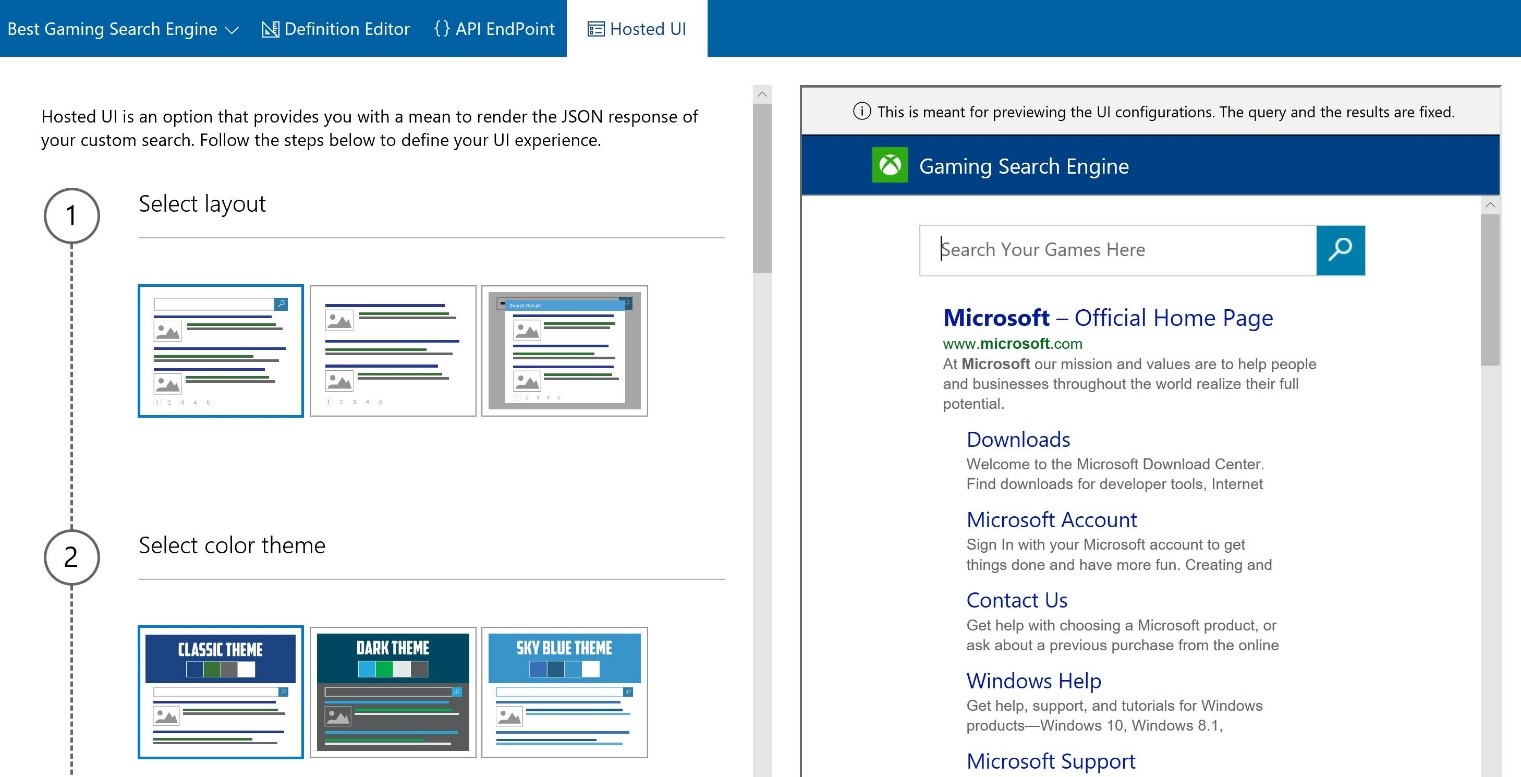
You can also use Hosted UI for your search engine by providing layout, color theme, and additional configurations, such as number of results per page, search box text, page title, logo and favicon URLs among other things. Below is an example of what your search engine could look like using the hosted UI:
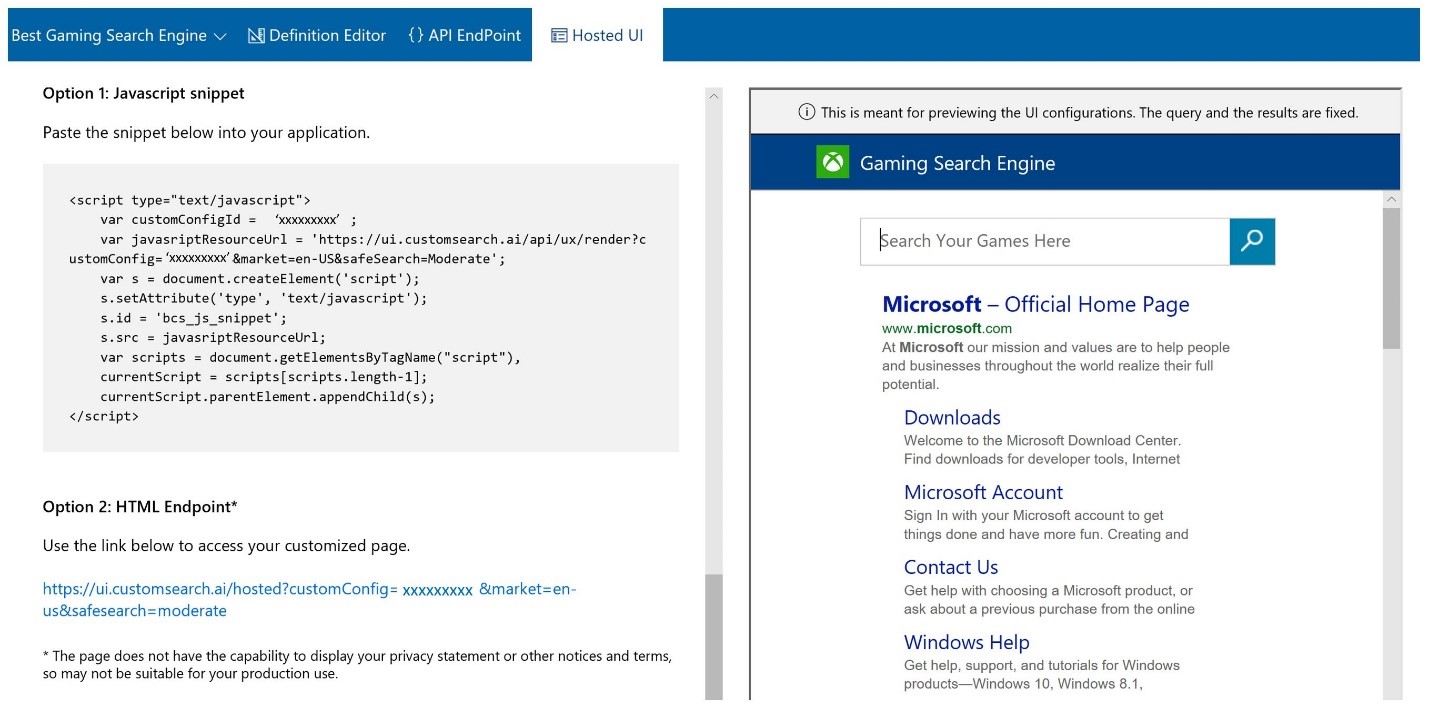
You can embed Javascript snippet in your application or use the HTML endpoint to start utilizing the hosted UI you just designed. Below is the snapshot manifesting javascript and HTML snippets for the instance just created. More details for consuming hosted UI are available in a tutorial.
Let us know what think about Bing Custom Search API and what would you like to see in future versions at Stack Overflow and Azure Support. We’re eager to learn about your customized search engine.
– Bing Team
Source: Bing Blog Feed
