Deploying WordPress application using VSTS and Azure – part one
This post is the first part of two blog posts, describing how to setup a CI/CD pipeline using VSTS for deploying a dockerized custom WordPress website working with Azure WebApp for Containers and Azure Database for MySQL.
The Motivation
The main motivation for building a WordPress CI/CD pipeline is the fact that WordPress is limited in supporting dynamic configuration to allow easy modification between different environments. Some values are hardcoded in the WordPress MySQL database. This limitation causing a time consuming task which limits our ability to deploy fast and more frequently.
The Idea
We will have four environments: local, dev, test and production. The local environment is for the developer that will run the docker images locally, commit the required changes, and will push the code to the master branch once they completed their work. The push action will initiate a CI process, which will build and push a new docker image to our Azure Container Registry. The base image of this docker image will be the WordPress image from the docker hub. As part of the dockerfile, a copy action will be executed for copying the new content into the new docker image.
After the CI process completion a CD process will start automatically, using Azure Database for MySQL as the WordPress DB each environment will have a separate database. For updating the hardcoded values DB, we will perform a DB export from a previous environment into a SQL script file. Execute find & replace will restore the new SQL file into the next environment DB. Also part of this process we will use Azure Application Insights WordPress plugin for logging and monitoring purposes.
Prerequisites
- Create an Azure account with the following services:
- One instance of Azure Container Registry.
- One instance of Azure Database for MySQL with 5 empty DBs.
- Three instances of Azure WebApp for Containers of each environment: dev, test, production, with one slot-staging.
- Four instances of Application Insights for each environment: local, dev, test, production
- Open a VSTS account with docker Integration extension installed from Visual Studio Marketplace. If you don’t have a Visual Studio Team services account yet, open one now.
It’s possible to create all the above Azure resources using ARM deployment task in VSTS.
Code structure
You can find Sample source code, create a new VSTS project and upload the code to master branch of this project.
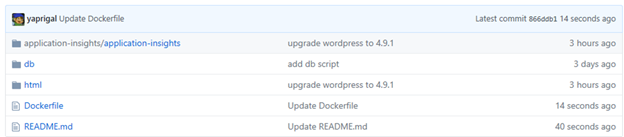
The code repository structure looks like this:

- Html folder – sample WordPress files.
- Db folder – sample WordPress script DB file that we need to restore into Azure Database for MySQL (referred in this blog as WordPress5000).
- Application-insights folder – contains Application Insights plugin folder.
- Dockerfile – for building the docker image.
We can run the following docker command on our local machine to run the sample WordPress locally. It will connect to MySQL DB on Azure, we might need to add our IP to the firewall rule of this instance.
docker run -e DB_ENV_HOST=[your mysql db url]:[your mysql port number] -e DB_ENV_USER=[your mysql db user name] -e DB_ENV_PASSWORD=[your mysql db password] -e DB_ENV_NAME=[your mysql database name] -p 5000:80 -d [your docker image name]
VSTS – Build Phase
Now, we are going to create a new build definition. Select the relevant source repository and choose empty template as your baseline for build process. Choose Hosted Linux Preview as agent queue:

Add two new docker tasks.
The first docker task is Build an image with the following values:
- Container Registry Type – Azure Container Registry.
- Azure subscription – select the relevant Azure subscription.
- Azure Container Registry – select the relevant Azure Container Registry.
- Action – Build an image.
- Docker File – select the dockerfile from the repository.
- Check the Use Default Build Context option.
- Image Name – [image name, all letters should be lowercase]: $(Build.BuildId).
- Check the Qualify Image Name option.
The second docker task is Push an image choose the following:
- Container Registry Type – Azure Container Registry.
- Azure subscription – select the relevant Azure subscription.
- Azure Container Registry – select the relevant Azure Container Registry.
- Action – Push an image.
- Image Name – same name as in first task.
- Check the Qualify Image Name option.
Under Triggers tab – enable continuous integration:

Now, we need to verify our build.
We need to make a small change in one of the project files and push the new version into the master branch, a new build process should start. That’s it for now, in this post we saw how easy is to create a CI process using VSTS and docker integration for creating a new dockerized custom WordPress image and push it into Azure Container Registry. Stay tuned for part 2 where we will continue with our journey for creating a complete CI/CD pipeline.
Resources
- Get started with CI/CD in VSTS
- Azure Web App for Containers
- Azure Container Registry
- VSTS container builds
- Deploy to an Azure Web App for Containers
- Azure Database for MySQL
- Azure Application Insights
Source: Azure Blog Feed