Move Managed Disks and VMs now available
We are encouraged by the response to the introduction of Managed Disks. Since the announcement, we’ve seen many customers take advantage of this new way to manage persistent storage for their Virtual Machines. Here are some of the benefits Managed Disks provides:
- The ability to scale your application without worrying about storage account limits
- Achieve high-availability across your compute and storage resources with aligned fault domains
- Create VM Scale Sets with up to 1,000 instances
- Integrate disks, snapshots, and images as first-class resources into your architecture
- Secure your disks, snapshots, and images through Azure Role Based Access Control (RBAC)
To read more about the benefits of Managed Disks, see Azure Managed Disks Overview.
We’re constantly improving the Managed Disks platform and working to bring new features to market based on customer feedback including:
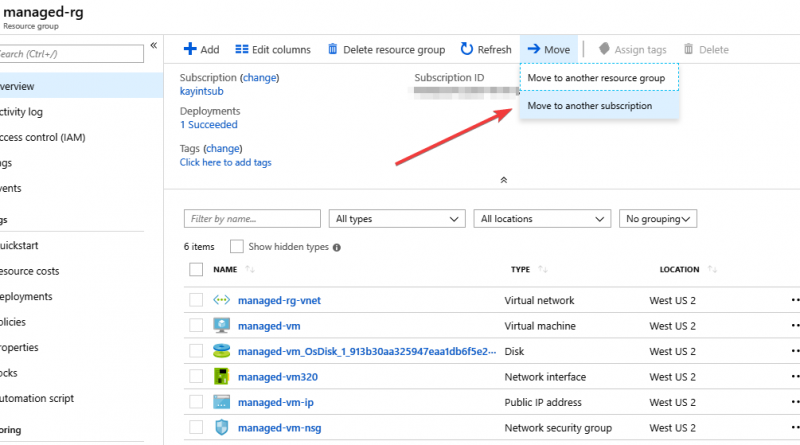
Another feature I’m excited to announce today is the availability of moving Managed Disks and VMs across resource groups and subscriptions with a single click. This also enables you to move Managed Images and Snapshots.
Get started
To use this capability, you’ll need register for the feature using the PowerShell or CLI instructions below.
PowerShell
Register-AzureRmProviderFeature -FeatureName ManagedResourcesMove -ProviderNamespace Microsoft.Compute
CLI
az feature register Microsoft.Compute ManagedResourcesMove
Move the resources
Portal


To learn more about moving resources with PowerShell or CLI, read our documentation.
Constraints
This new capability does not yet support:
- Managed VMs enabled for Azure Backup. You can move such VMs by following these instructions.
- Managed VMs referencing Azure Key Vault
Source: Azure Blog Feed