
Cross Region Replication
In this post we are going to talk about cross region data protection in Azure NetApp Files. I’ll assume that you’ve already created your Azure NetApp Files (ANF) Capacity Pools and Volumes and mounted them on your hosts. If not, you might want to have a read of this post Building Enterprise Grade Files Shares in Azure and this post Mounting your Azure NetApp Files Volumes.
What is Cross Region Replication?
As of October 2021, the Azure NetApp Files (ANF) Cross Region Replication (CRR) feature was made generally available. Using CRR, you can configure asynchronous replication from your source volumes in one region, to your destination volumes in either its regional or non-regional pair. More details on which regions have CRR available and how the regional and non-regional pairs are configured can be found here. The source volume is read/write, whilst the destination volume is read only. The CRR feature in ANF will give you ability to failover to the destination region in the event of an outage in the source region.
Replication Schedule
As of writing, the CRR feature can be configured to replicate data at either 1 day, 1 hour or 10 minute intervals. The as a rule of thumb, the typical RPO can be up to twice that of the replication interval. In regards to RTO, the time to restore service availability and provide access to the data, it is expected that this can be accomplished within less than a minute.
Configuring CRR
Before configuring CRR, it is worth familiarising yourself with CRR requirements and considerations, you can view them on the Microsoft docs pages here. For the next section you will need to have ANF accounts created in regions you wish to configure CRR and the VNets and subnets with delegation to the ANF service configured.
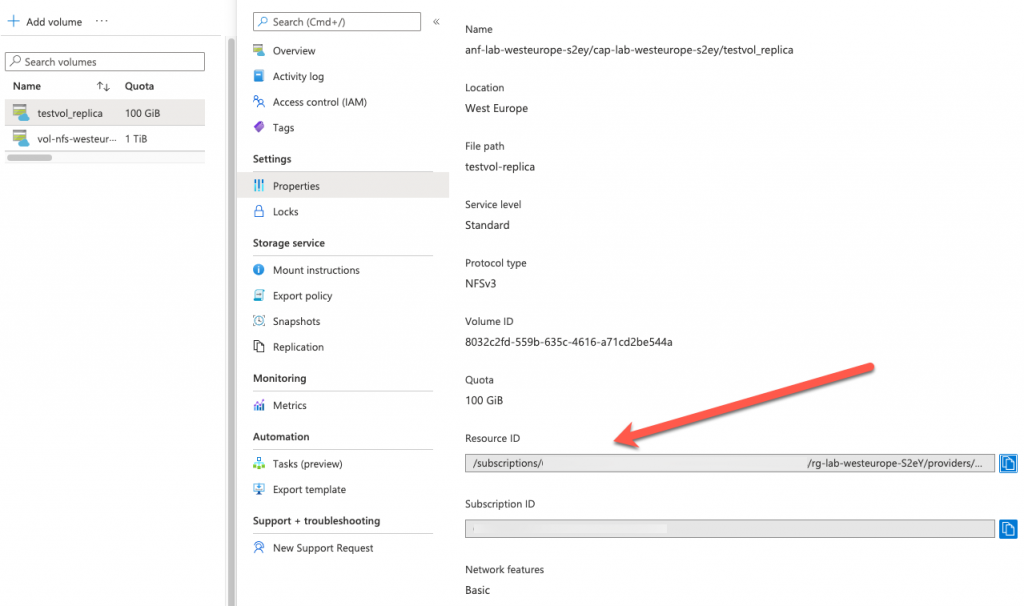
- First of all you need to locate the resource ID of your source volume.
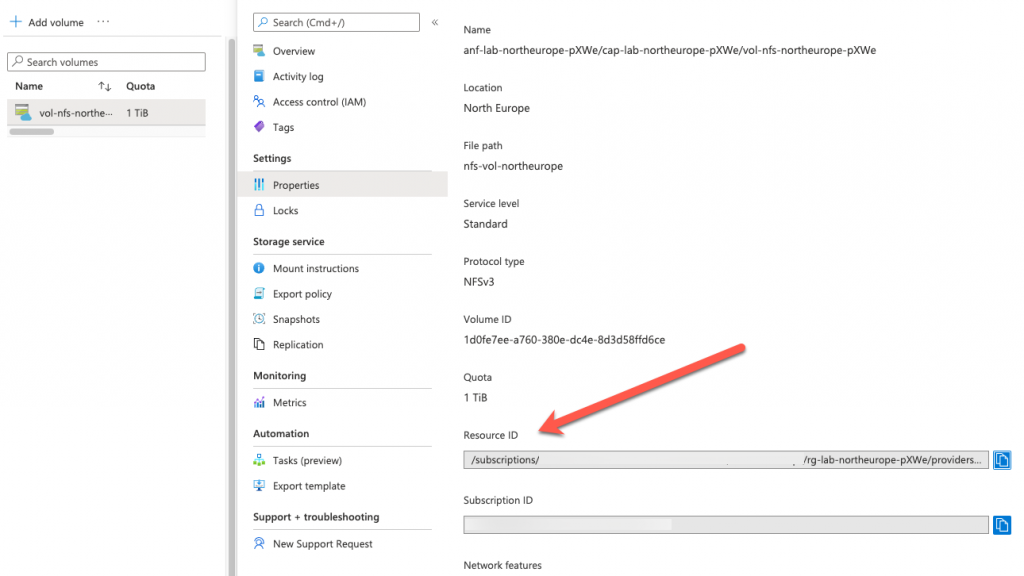
2. Copy this resource ID of the source volume, you will need it later in the configuration steps.
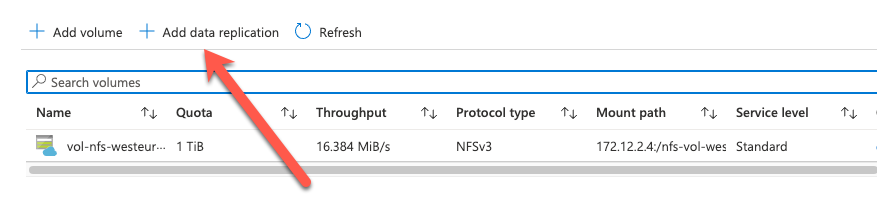
3. Next you need to create a data replication volume. In the volume section of the ANF blade, click Add data replication
4. In the basics section, give the destination volume a name, select the capacity, vnet and subnet.

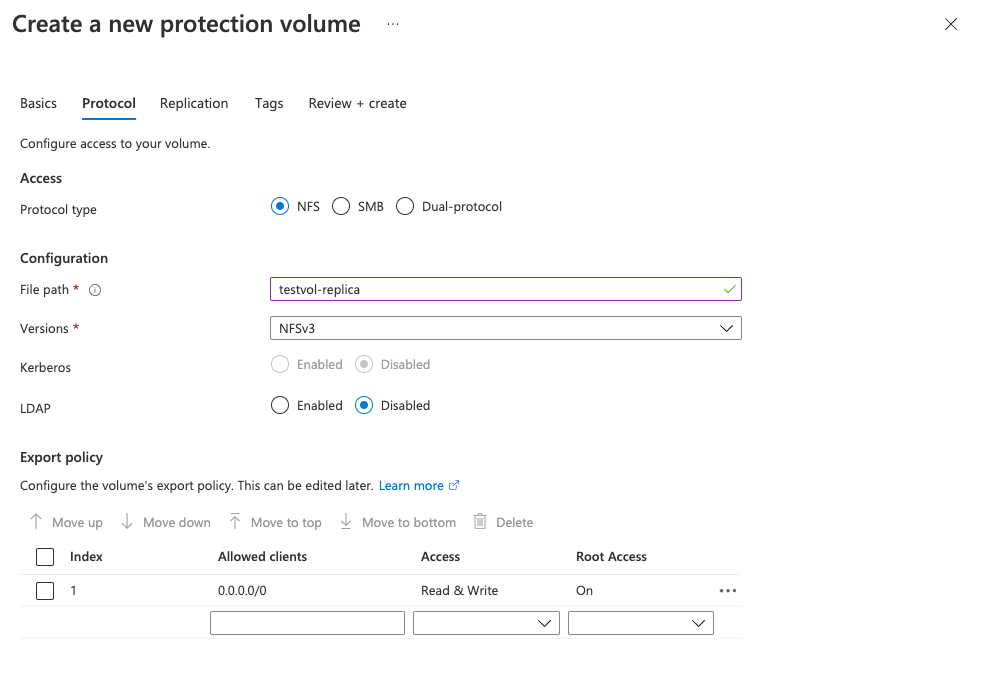
5. Complete the protocols section, file path, version and export policy.
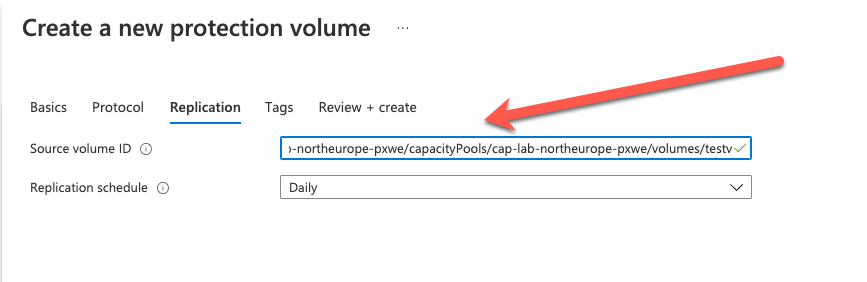
6. On the replication section, paste the resource ID that you save earlier into the Source Volume ID. And select your replication schedule.
7. Finally, add your resource tags as required and click Review & Create.
8. Next, we need to authorise the replication, for this we are going to need to resource ID of the destination volume. In the volume section select properties and copy the resource ID of the destination volume.
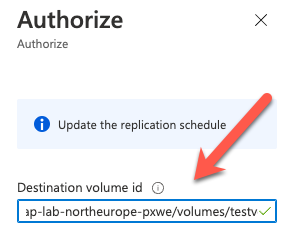
9. We now need to go to the Source volume, select the Replication option and Authorise the destination volume.

10. Paste the resource ID of the destination volume into the box and click OK.
11. After a few minutes, the volume replication will be configured and in a Mirrored and Healthy state.

12. That’s it, you have now configured you volumes for CRR.
Summary
Once again, I hope this short post has been useful to you. The ANF CRR feature has added another dimension to the service by allowing for asynchronous replication of volumes across regions. I also hope that it enforces once again how simple the Azure NetApp Files service to consume. The manual QoS feature allows for the flexibility to assign throughput independently to a volume. This features makes the ANF service more flexible but still maintains its simplicity. The ANF service is constantly being updated and improved by Microsoft, to see whats new with ANF check the link here. If you would like to learn more about Azure NetApp Files, check out the Microsoft docs pages here.