Setup Azure NetApp Files Cross Region Replication (CRR) using Terraform
In last weeks post we used Terraform to create an Azure NetApp Files (ANF) volume as well as all the other supporting services. In this post we will configure (ANF) Cross Region Replication (CRR). What is CRR, I hear you cry?!
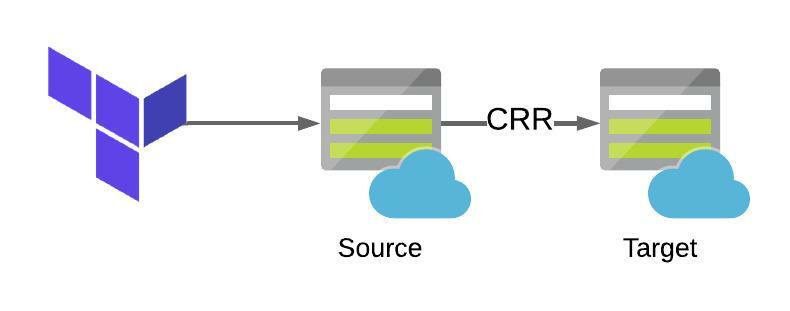
CRR in ANF gives to the ability to protect volumes across regions and safeguard against regional failures. Once configured, it creates an asynchronous copy of the source volume to a destination volume in another region. If, god forbid, there was ever a regional outage, you can failover to the secondary region. If you’d like to know more about CRR, have a look at another of my posts about this feature here.
In the aforementioned post, we configured CRR via the Azure portal, in this post, we are going to do this using Terraform.
Please note, you must have registered your subscription to use the NetApp Resource Provider. For more information on this please have a look at the docs page here.
Hopefully you’ll have a code editor and Terraform installed on your system. If not, to get them installed, whiz on over to this article here.
What are we building today?
Today we will be building the following resources:
- 1 x Resource Group
- 1 x Keyvault
- 1 x Secret
- 1 x Virtual Network
- 1 x Subnet
- 2 x Azure NetApp Files account
- 2 x Azure NetApp Files capacity pool
- 2 x Azure NetApp Files volume
- Cross Region Replication between ANF volumes
The Terraform code used for this lab can be found in my GitHub here. The files in the repo are used to do the following:
- main.tf – Used to specify providers and create the resource groups
- variables.tf – Used to define variables for this deployment. They are defaults and referenced using the terraform.tfvars file.
- terraform.tfvars – This is file the only file you’ll need to edit amend parameters for your deployment.
- output.tf – This file will be used will be used to capture the randomly generated name of the Resource Group for future deployments that need to reference the name of this resource group.
- keyvault.tf – This file will be used to create the Azure Keyvault and Secret. These will be used in future deployments to specify the username and password for Virtual Machines.
- vnets.tf – This file is used to create the Azure Virtual Network that will have subnet delegation the the ANF service, more on this later.
- anf_account.tf – This file is used to create the Azure NetApp Files account.
- anf_capacity_pool.tf – This file is used to create the Azure NetApp Files capacity pool.
- anf_volumes_crr.tf – This file is used to create the ANF volumes. It will also configure CRR.
Configuring CRR
Now we are going to configure CRR on a volume. In order to do this will we need a lab with ANF accounts, capacity pool and volumes. In my previous post we build out a lab with a single volume, you can read that post here. For this lab will build ANF resource in two regions and configure CRR. The code below shows the creation of of two volumes, the second volume is where the magic of CRR is configured. For the purpose of this lab we will be using the NFS protocol.
# Create Azure NetApp Files NFS Volume 1
resource "azurerm_netapp_volume" "anf_nfs_vol_1" {

  lifecycle {
    prevent_destroy = false
  }

  name                = "vol-nfs-${var.region_1}-${random_string.rg_random_1.result}"
  location            = var.region_1
  resource_group_name = azurerm_resource_group.rg_1.name
  account_name        = azurerm_netapp_account.anf_acc_1.name
  pool_name           = azurerm_netapp_pool.anf_cap_1.name
  volume_path         = "${var.vol_path_nfs}-${var.region_1}"
  service_level       = var.service_level_std
  subnet_id           = azurerm_subnet.vnet_1_snet_2.id
  protocols           = [var.protocol_nfs]
  storage_quota_in_gb = 1024

  export_policy_rule {
    rule_index          = 1
    allowed_clients     = [var.address_vnet_1_snet_1]
    protocols_enabled   = ["NFSv3"]
    unix_read_write     = true
    root_access_enabled = true
  }

  tags = {
    Environment = var.tag_environment
    CreatedBy   = var.tag_createdby
    CreatedWith = var.tag_createdwith
    Project     = var.tag_project
  }
}

# Create Azure NetApp Files NFS Volume 2
resource "azurerm_netapp_volume" "anf_nfs_vol_2" {

  lifecycle {
    prevent_destroy = false
  }

  name                = "vol-nfs-${var.region_2}-${random_string.rg_random_2.result}"
  location            = var.region_2
  resource_group_name = azurerm_resource_group.rg_2.name
  account_name        = azurerm_netapp_account.anf_acc_2.name
  pool_name           = azurerm_netapp_pool.anf_cap_2.name
  volume_path         = "${var.vol_path_nfs}-${var.region_2}"
  service_level       = var.service_level_std
  subnet_id           = azurerm_subnet.vnet_2_snet_2.id
  protocols           = [var.protocol_nfs]
  storage_quota_in_gb = 1024

  export_policy_rule {
    rule_index          = 1
    allowed_clients     = [var.address_vnet_2_snet_1]
    protocols_enabled   = ["NFSv3"]
    unix_read_write     = true
    root_access_enabled = true
  }

  tags = {
    Environment = var.tag_environment
    CreatedBy   = var.tag_createdby
    CreatedWith = var.tag_createdwith
    Project     = var.tag_project
  }

  data_protection_replication {
    endpoint_type             = "dst"
    remote_volume_location    = azurerm_resource_group.rg_1.location
    remote_volume_resource_id = azurerm_netapp_volume.anf_nfs_vol_1.id
    replication_frequency     = "10minutes"
  }

}
The final section of the above file is where CRR is configured. In the example below, the volume is set as a destination, the remote volume resource ID is specified and the replication interval to ten minutes.
data_protection_replication {
    endpoint_type             = "dst"
    remote_volume_location    = azurerm_resource_group.rg_1.location
    remote_volume_resource_id = azurerm_netapp_volume.anf_nfs_vol_1.id
    replication_frequency     = "10minutes"
  }
Deploying the code
Once you have your files in your Terraform directory you can go ahead and deploy the code. To do this, open your editor of choice and browse to your Terraform directory.
1. In your Terraform directory, run the following command to initialise the Terraform deployment and download the required modules.
terraform init2. Next we need to create a Terraform plan. This is used to determine what is required to create the configuration you have specified in your Terraform directory. To do this, run the command below.
terraform plan -out main.tfplan3. Now that you have generated your Terraform deployment plan, we can push the Terraform code into Azure and create our resources. Run the command below to apply your code.
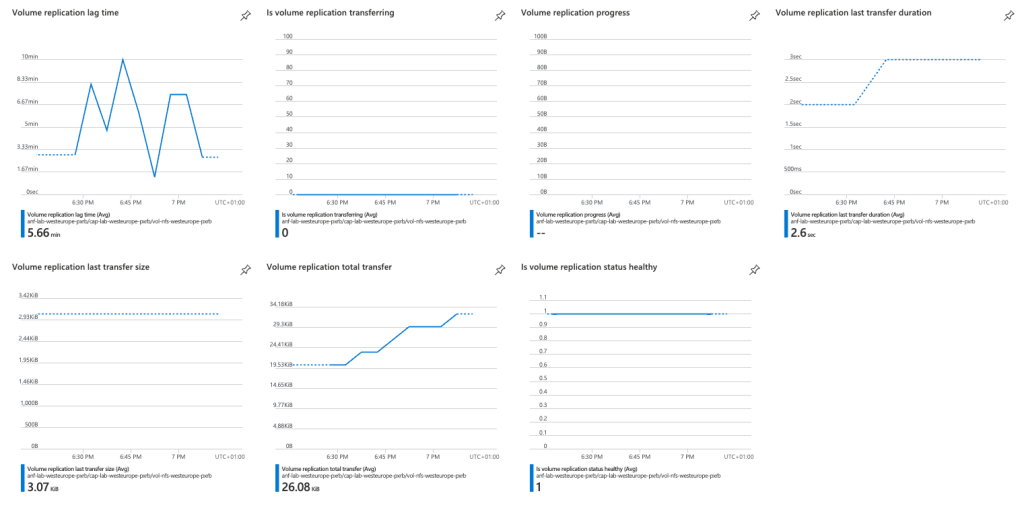
terraform apply main.tfplan4. That’s it, you have now deployed your Azure NetApp Files resources using Terraform. If you have a look in the Azure portal you will see the resource group you created and within it the resources. If you look at the volumes, under the replication section you will see that CRR have been configured successfully and after ten or so minutes, hopefully the status showing as Healthy and Mirrored.


5. Now that you have successfully deployed your resources into Azure, once you have finished with them, it’s time to clean it up and remove your deployment. This is quite straightforward, simply run the command below. This will use the .tfstate file and destroy all resource that terraform built using the apply command previously.
terraform destroySummary
I hope that this very short blog post about configuring Azure NetApp Files Cross Region Replication (CRR) using Terraform has been helpful? CRR is an extremely important feature in ANF as it brings the ability to seamless protect volumes across regions. This feature also acts as a huge compliment to a BCDR strategy. I feel the more you use Terraform to deploy infrastructure into Azure, the more you will appreciate its power and simplicity.
